
How Electricians Add a Ceiling Fan Where a Light Fixture Doesn’t Exist
Updated: Jul 27, 2026
Adding a ceiling fan to a room with no existing wiring requires specialized electrical work, not just a simple hardware swap. Master electricians evaluate power sources, fish NM-B wire through closed walls using minimalist drywall cuts, and lock expandable steel braces between joists for dynamic weight support. This precise, code-compliant retrofit guarantees safe, vibration-free, long-term performance.
Many homes across suburban Minnesota feature beautiful, sprawling bedrooms or sunrooms with a frustrating limitation: there is no central junction box, no switch path, and no wiring in the ceiling.
While swapping an existing fixture for a ceiling fan is straightforward, adding a fan to a ceiling with no existing wiring is a highly specialized infrastructure project. Fortunately, a licensed master electrician can safely run new wire for a ceiling fan and establish rock-solid structural support without gutting the drywall or ruining the room's aesthetics. Hiring a professional guarantees a clean, code-compliant installation from day one, ensuring your home's value and safety are protected. Learn more about how these precision upgrades work by exploring our dedicated Ceiling Fan Installation Services.
Swapping a Fixture vs. Building from Scratch
When planning a budget for an overhead comfort upgrade, it is critical to address the true cost of adding a ceiling fan with no wiring. General pricing templates and flat-rate blind estimates frequently fail because they completely overlook the physical realities of residential electrical work. Every home has a unique internal framing system, meaning a true professional must evaluate the specific layout of wall cavities and structural boundaries rather than quoting a one-size-fits-all price.
Simple Hardware Swaps vs. Complex Structural Retrofits
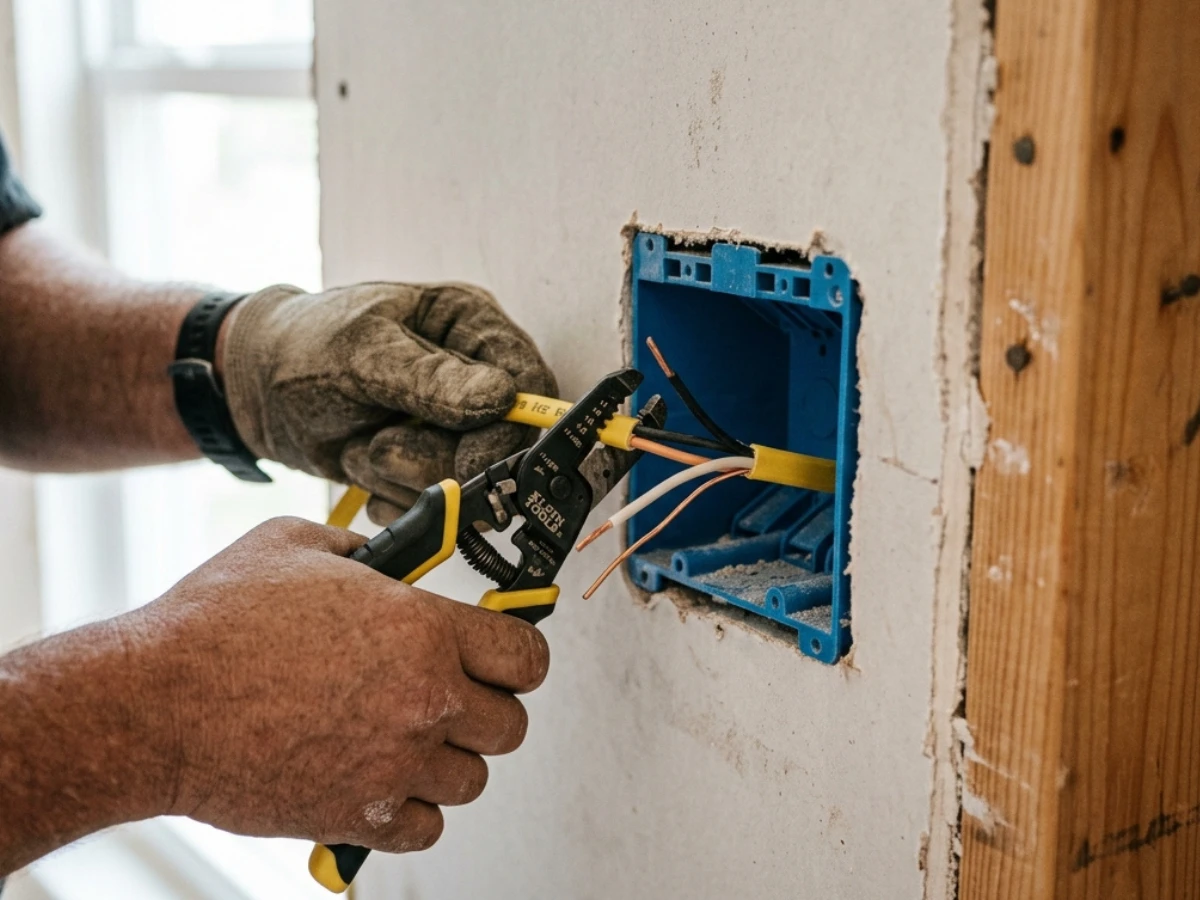
There is a vast structural and operational difference between a simple fixture swap and a comprehensive retrofit. A standard fixture swap assumes that a functional, code-compliant, fan-rated structural box is already sitting energized behind the ceiling drywall. In these scenarios, we simply secure the new hardware to the existing mounting bracket.
However, a new retrofit installation requires building an overhead electrical grid entirely from scratch. This process involves extending a branch circuit, calculating active power loads to protect panel health, and surgically mapping framing paths. Then we fish raw cables through hidden wall bays, and install heavy expandable steel braces to support the weight of a spinning motor. Furthermore, the scope of work includes cutting into wall cavities for routing and installing a ceiling fan switch on the wall. Because a retrofit demands technical and precision work rather than just mounting a product, the upfront labor investment reflects a complex project rather than a quick appliance replacement.
Phase 1: Locating the Power Source & Mapping the Circuit
Tracing the Overhead Electrical Pathway
Before a single tool touches the ceiling, we must answer a foundational infrastructure question: where does the electricity come from? Bringing a ceiling fan to life requires sourcing a stable, continuous power supply. As licensed master electricians, we evaluate the existing wiring and the layout of the room to determine the most efficient and code-compliant supply point.
We typically consider three primary pathways when routing power to a new overhead fixture:
- The Wall Outlet Tap: Splicing into a nearby, continuously hot wall receptacle circuit, provided the branch line has remaining amperage capacity.
- The Attic Drop: Accessing an open attic space directly above the room to pull power down from an existing junction box, minimizing structural wall routing.
- The Dedicated Line: Running a brand-new, independent branch circuit all the way back to the main electrical service panel board. This option is necessary if residential load metrics indicate the room's current electrical grid is already operating near its physical limits.
The Master Electrician Diagnostic Touch
Determining which pathway to use requires strict adherence to the National Electrical Code (NEC), alongside regional regulatory updates enforced across Minnesota and Wisconsin. A modern ceiling fan equipped with a multi-speed motor and an integrated LED light kit introduces unique electrical demands, including localized thermal stress and initial inrush current spikes. If an existing circuit already supports high-draw bedroom appliances, adding a fan motor could overload the branch line. By auditing the existing panel layout and verifying the home's operational thresholds, we ensure the new system runs safely without tripping breakers or causing local voltage drops.
Phase 2: Fishing NM-B Wire Through Closed Walls Without Disaster
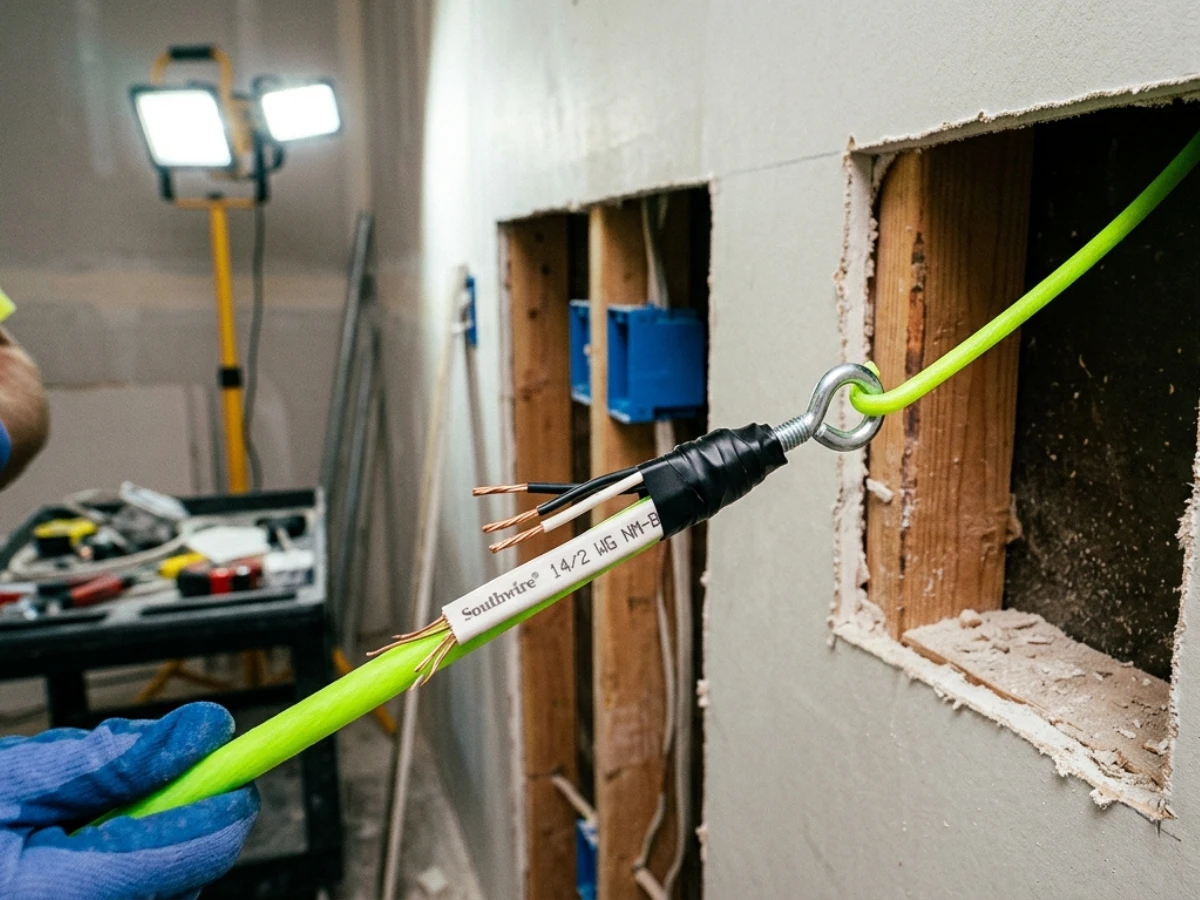
Once the ideal power source is mapped out, the next phase is a delicate game of hidden navigation we call ‘wire fishing.’ Navigating structural wood framing behind finished plaster or drywall requires the precision of a surgeon. Experienced electricians treat wall and ceiling cavities like a map of pathways, gently threading high-grade NM-B wire through completely enclosed architecture without changing the look or structural integrity of your room.
Bypassing Fireblocks and Joists with Specialized Trade Tools
Moving wires vertically down a wall cavity or horizontally across a ceiling means dealing with wooden obstructions. Homes built across the Upper Midwest feature internal structural boundaries like horizontal fireblocks tucked inside wall studs, or heavy solid-wood ceiling joists. Bypassing these boundaries without removing wide sheets of drywall requires specialized trade tools:
- Flexible Spring-Steel Fish Tapes: Used to slide through tight gaps and hook lines across long, blind distances.
- Fiberglass Glow Rods: Rigid yet flexible interlocking sticks that remain perfectly straight inside a dark wall bay, allowing a technician to aim and guide wires toward an exact exit point.
- Long-Shaft Flex Drill Bits: Heavy-duty, flexible drill shafts measuring up to six feet long. Electricians slide these bits down into a narrow wall opening, angling them down to drill a clean conductor hole right through the center of a hidden wooden fireblock or wall plate.
The Truth About Drywall: Surgical Notches over Total Destruction
The biggest fear for most homeowners during an electrical upgrade is the threat of architectural damage. Many assume that adding a completely new fixture means gutting the ceiling and leaving behind a dusty trail of massive drywall repairs.
The professional approach to cutting drywall to run fan wire is strictly minimalist. Instead of tearing open the entire room, an expert electrician uses structural scanners to map out the exact location of every stud and joist. If a framing obstruction blocks the wire path and cannot be bypassed blindly, a technician cuts a tiny, exploratory notch—usually less than a few inches wide. These notches are specifically placed where a joist meets a wall plate, offering just enough physical access to drill a clean wire hole. By keeping these openings small and clean, the structural integrity remains intact, and any minor cosmetic patching is simple and fast.
Phase 3: Anchoring the Hidden Foundation (The Fan-Rated Box)
Once the new branch circuit is routed smoothly to the center of the room, attention must shift to structural safety. A standard light fixture box is only rated for a static load—a dead weight hanging perfectly still. Local electrical codes across Minnesota and Wisconsin highlight the mechanical difference between static weight and dynamic kinetic strain.
A ceiling fan introduces an active, spinning motor that generates kinetic vibration and multi-directional torque. Hanging a fan from a standard plastic light box is a dangerous violation of electrical codes. Over time, the continuous dynamic strain will stress the plastic housing, causing it to crack, or slowly pull the framing nails out of the surrounding wooden joists until the entire fixture falls down.
Locking the Expandable Support Brace
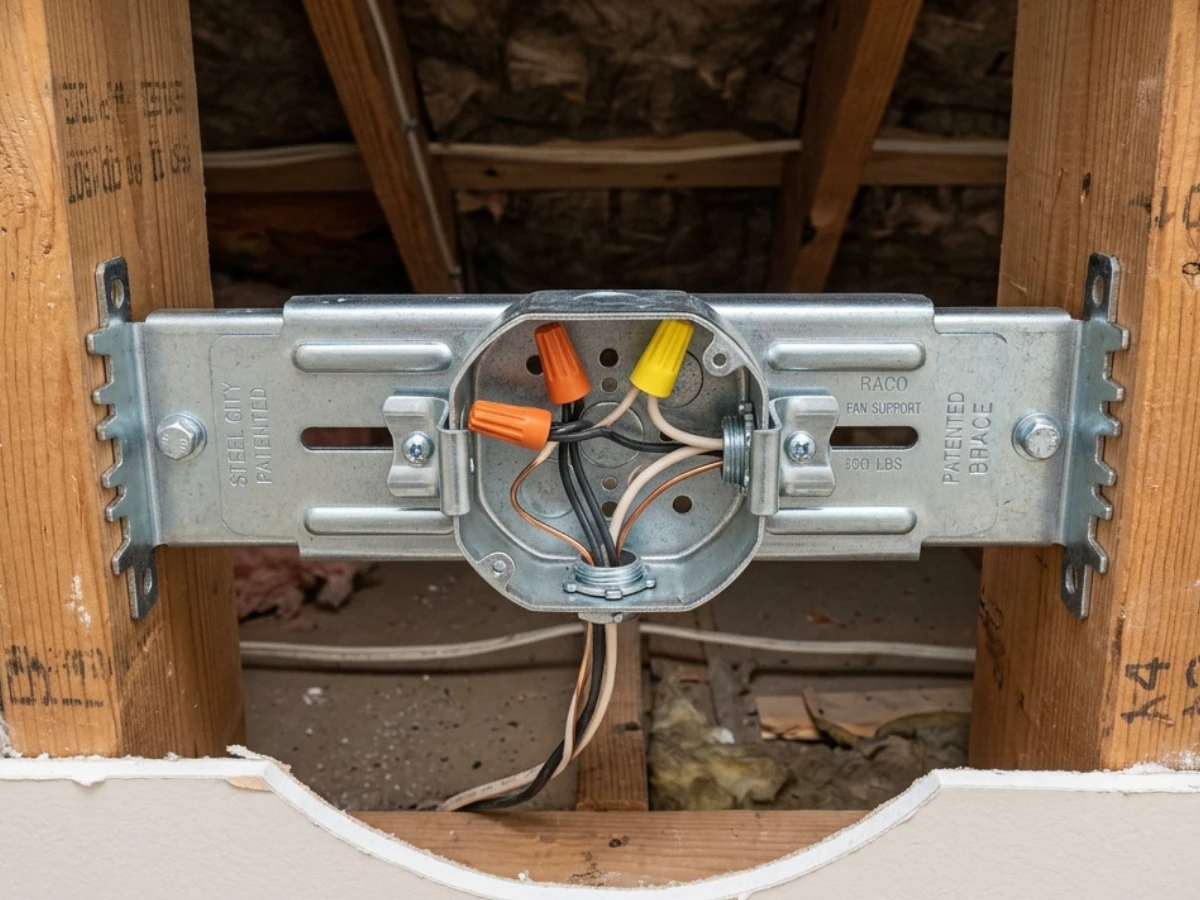
To eliminate this risk, an installer sets up a solid structural foundation without needing to tear open the ceiling. The process relies on an expandable steel support brace and a fan-rated junction box designed for easy installation.
- Inserting the Brace: The electrician slides the compact steel brace through the small circular hole cut into the drywall, pushing it up into the hidden ceiling cavity.
- Anchoring Between Joists: Once inside, the technician turns the metal shaft. Rotating the shaft expands the brace horizontally until its sharp steel tension spikes push outward and bite deeply into the wooden joists on either side.
- Securing the Box: This creates an immovable steel beam spanning the space between the joists. The technician then bolts a code-compliant steel junction box directly onto the middle of the brace.
By anchoring directly into the home’s timber framing, this setup safely spreads out the fan’s weight and motor vibration, giving it a more stable foundation.
Phase 4: Installing the Ceiling Fan Switch on the Wall
Seamless Wall Control Integration
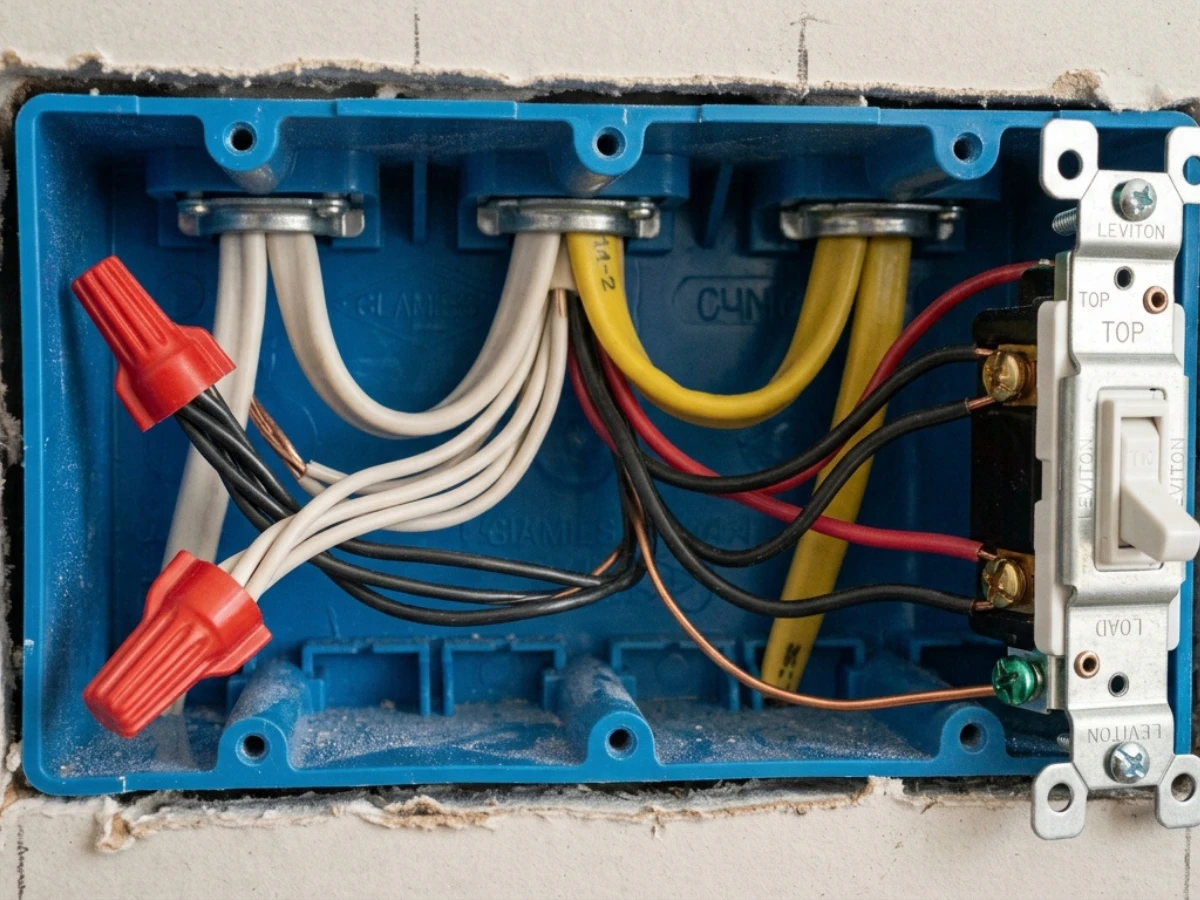
A ceiling fan retrofit is only complete once intuitive, reliable wall controls are established. Rather than forcing homeowners to rely on unstable pull chains or loose handheld plastic remotes, a professional electrician updates the entry switch box to place dedicated hardware. This makes it easier to operate the fan right from the wall plate.
Technical Configuration and Control Options
Depending on the room's layout, structural accessibility, and specific fixture goals, an electrician will configure the system using one of two methods:
- The Dual-Switch Configuration: This hardwired setup requires fishing a high-grade 3-wire NM-B Romex line between the ceiling box and the wall switch. This framework allows the homeowner to control the fan motor speed and the LED lighting kit separately from two individual switches on the wall.
- Modern Smart & Digital Stations: If fishing new wire behind sheetrock or plaster is difficult due to framing or other obstructions, a digital wall control that uses radio signals offers an easy fix. An electrician installs a digital wall module that wires directly into a standard 2-wire setup for continuous power. This switch uses reliable radio frequencies to pair directly with an internal receiver module tucked inside the ceiling fan canopy, providing precise multi-speed fan control and light dimming functionality.
Conclusion
Adding a modern ceiling fan with lights to a room that’s never had it isn’t just a cosmetic upgrade; it’s real electrical infrastructure work. Trusting a professional, licensed installer protects your home from drywall damage, unstable fixture wobbles, and hidden code violations down the road.
At Loch Monster Electric, we support every installation with our honest, transparent Time & Materials model. You only pay for direct services and materials used. Let your neighborhood experts secure your home and bring you comfort.
Schedule a new ceiling fan consultation with us. Call Loch Monster Electric at 763-292-1191 today.
Frequently Asked Questions
A complete retrofit—routing new wiring, fishing cable through closed walls, installing a fan-rated brace, and mounting wall controls—typically takes 2 to 4 hours. The exact timeframe depends on attic access, the complexity of wall framing obstructions, and whether a new circuit must be run back to the main panel.
For safety and proper airflow, National Electrical Code (NEC) guidelines require fan blades to hang at least 7 feet above the floor, with at least 8 to 9 feet being ideal. In rooms with lower ceilings, electricians use low-profile "hugger" or flush-mount fans attached directly to the fan-rated support box.
Usually not. Most modern ceiling fans with LED lights pull very little power (typically 50 to 100 watts). However, if your main electrical panel is already at full capacity or uses older equipment, an electrician may need to install a tandem breaker or recommend a dedicated circuit during the initial load audit.
Because electricians use techniques like fiberglass glow rods, flex drill bits, and small exploratory notches, drywall damage is kept to an absolute minimum. You will not need wide drywall replacement, and any small, pencil-to-palm-sized notch cuts can be easily patched with spackle and touch-up paint.
Yes. If fishing a new 3-wire cable down to a wall switch is difficult or cost-prohibitive, your electrician can supply continuous power to the ceiling box from an existing branch line and install a radio-frequency (RF) receiver module inside the fan canopy. This allows complete wireless control via a wall-mounted holder or handheld remote.