
How to Install Smart Switches When Your Older Home Lacks a Neutral Wire
Updated: Aug 11, 2026
Struggling to upgrade your older home’s lighting? This guide explores the challenges of installing a smart switch without a neutral wire. Learn about the risks of older electrical systems, DIY workarounds, and why professional rewiring adds long-term value.
You’ve got your morning coffee in hand, your brand-new smart switch is unboxed, and you’re ready to bring your vintage home into the modern age. You unscrew the wall plate, pull out the existing switch, and … wait, where are the wires? Instead of the nest of wires you see in most YouTube instructional videos, you find just two simple wires attached to the switch. No white neutral wire. No ground.
If you’ve had that sinking feeling in your gut, you aren't alone. We see this every single week here at Loch Monster Electric (LME). We love the charm of our local historic homes with their hardwood floors, the original trim, and a character all of their own. But that character often comes with electrical systems that were installed long before smart home technology was even a dream.
The good news? You don’t have to give up on your smart home goals. Whether you’re looking for a quick fix or a permanent upgrade, we’ll help you fix the smart switch no neutral wire dilemma in your classic Twin Cities home. If you’re ready to get a quote for a neutral wire installation, call us at 763-292-1191.
Why Older Homes in the Twin Cities Are Different
Whether you are in a classic bungalow in South Minneapolis or a beautiful old colonial near Summit Avenue in St. Paul, your electrical system is a time capsule. Many of these homes were wired during a time when simple toggle switches were the pinnacle of technology.
The Importance of the Neutral Wire
Think of your electrical system like a water loop. You have water (electricity) coming into the fixture, and it needs a way to flow out to complete the loop. In modern electrical code, every switch box is required to have a neutral (usually white) wire. This wire provides a return path for electricity, completing the circuit.
Because a smart switch is an active computing device, it needs constant power to run its internal processor, sensors and Wi-Fi radios/Bluetooth chips. It must stay powered on even when your lights are turned off so that it can receive commands from your phone or voice assistant.
In older homes, the wiring loops the hot wire through the switch to control the circuit. When the switch is on, it completes the loop to power the light. When off, it breaks the connection. Because these traditional switches only needed to interrupt the power flow, there was no need for a neutral wire. This simple design is now a major headache for modern smart tech.
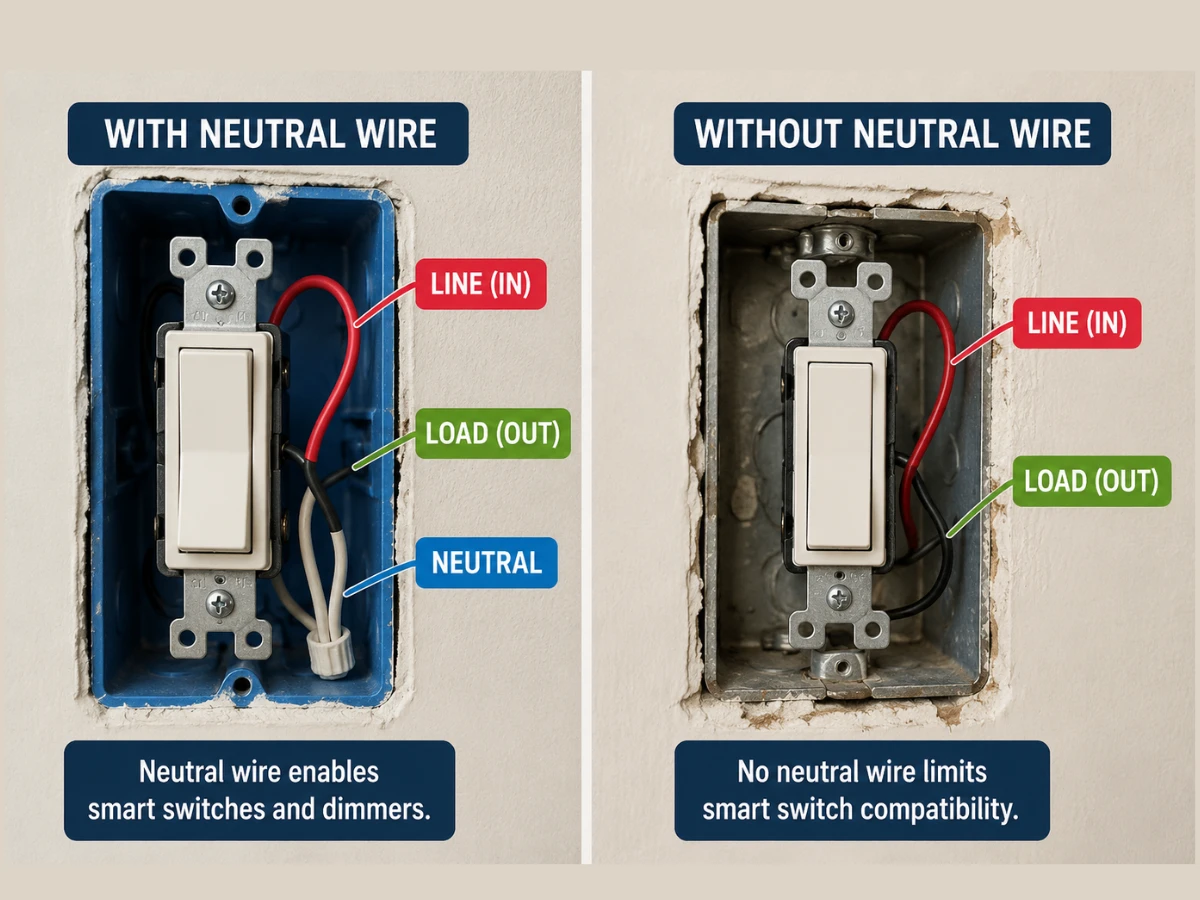
Thinking about upgrading your home with smart lighting? This smart switches electrical installation guide explores the technical realities of these devices, including neutral wire requirements, home infrastructure assessments for Twin Cities homes, and the safety benefits of hiring a professional.
How to Install Smart Switches When There Is No Neutral Wire
If you are determined to tackle a quick install, you can purchase specialized switches labeled for "No Neutral Required." Here is how that process generally looks:
Step 1: Turn Off the Circuit Breaker
Never work on live wires. Use the circuit breaker in your electrical panel to cut power to the specific room you are working in and verify it with a non-contact voltage tester.
Step 2: Disconnect the Old Switch
Unscrew the device and carefully detach the two wires.
Step 3: Identify the Load and Line
You will need to determine which wire carries the incoming power (Line) and which leads to your light fixture (Load) using a multimeter.
Note: Do not rely on visual cues like wire color or position, as these are rarely standardized in older homes and may not accurately indicate function. If at any point you feel unsure about identifying the Line vs. Load wires, stop immediately. It is much safer to have a pro verify this than to guess.
Step 4: Install the Switch
Follow the manufacturer’s instructions to connect the Line and Load wires to the smart switch.
Step 5: Install the Bypass (Crucial)
Most non-neutral switches come with a small capacitor or bypass module. You will need to install this at the light fixture itself (not the wall box) to ensure the bulb doesn't flicker or ghost when the switch is off.
Step 6: Secure and Test
Carefully tuck the wires back into the box (older boxes are often shallow, so be gentle) and restore power to test the connection.
The Limitations of Installing Smart Switches Without A Neutral Wire
While these specialized switches are a clever workaround, it’s important to understand that they are just that, a workaround. Because they don't have a dedicated return path for electricity, they have to steal a tiny amount of power to keep their Wi-Fi radios running. This can come with a few compromises:
- Flickering and Ghosting: Without a neutral wire, the circuit can become unstable. Even with a bypass installed, some LED bulbs may still flicker or glow faintly when the light is supposed to be off.
- Bulb Compatibility: You might find that your favorite LED bulbs aren't compatible with these switches. You may be forced to switch to specific bulbs recommended by the smart switch manufacturer.
- Limited Feature Set: Because they are managing power-stealing technology, these switches sometimes lack the advanced processing power or the extensive features found in their neutral-wire-required counterparts.
- Maintenance: If the bypass capacitor at the light fixture fails, you’ll need to get back up on that ladder to troubleshoot the fixture, which isn't always convenient.
The Professional Approach: Pull A Neutral Wire
The professional, long-term solution is to bring the home wiring up to modern standards. When we are hired for rewiring light switches for smart home setups, we don't just patch the problem. We fix the infrastructure. Here’s what we do:
Step 1: Safety & Power Isolation
Before touching any wires, we perform an electrical inspection to locate the correct circuit breaker at the main electrical panel and shut off the power. We then use a non-contact voltage tester and a multimeter inside the switch box to verify that the wires are completely dead.
Step 2: Plan the Wiring Route
We carefully trace the path of your existing wiring, ensuring we find the most direct route that avoids unnecessary stress on old components.
Step 3: Route Code-Compliant Cable
Adding a neutral isn't as simple as pulling a single white wire through the wall. Doing that incorrectly creates a hidden fire hazard. To do this safely and legally, we replace the entire hidden cable assembly with an updated, multi-wire line. We use specialized fish tape to carefully snake this new cable through your existing walls from the nearest safe power source.
This step requires precision and experience to get the job done safely without damaging your historic lath and plaster or original wood trim.
Step 4: Install and Test Smart Switch
We install the high-end smart dimmer of your choice, ensuring every connection including the neutral and the safety ground is properly secured. Once the power is safely restored, we test the system to confirm consistent, flicker-free performance.
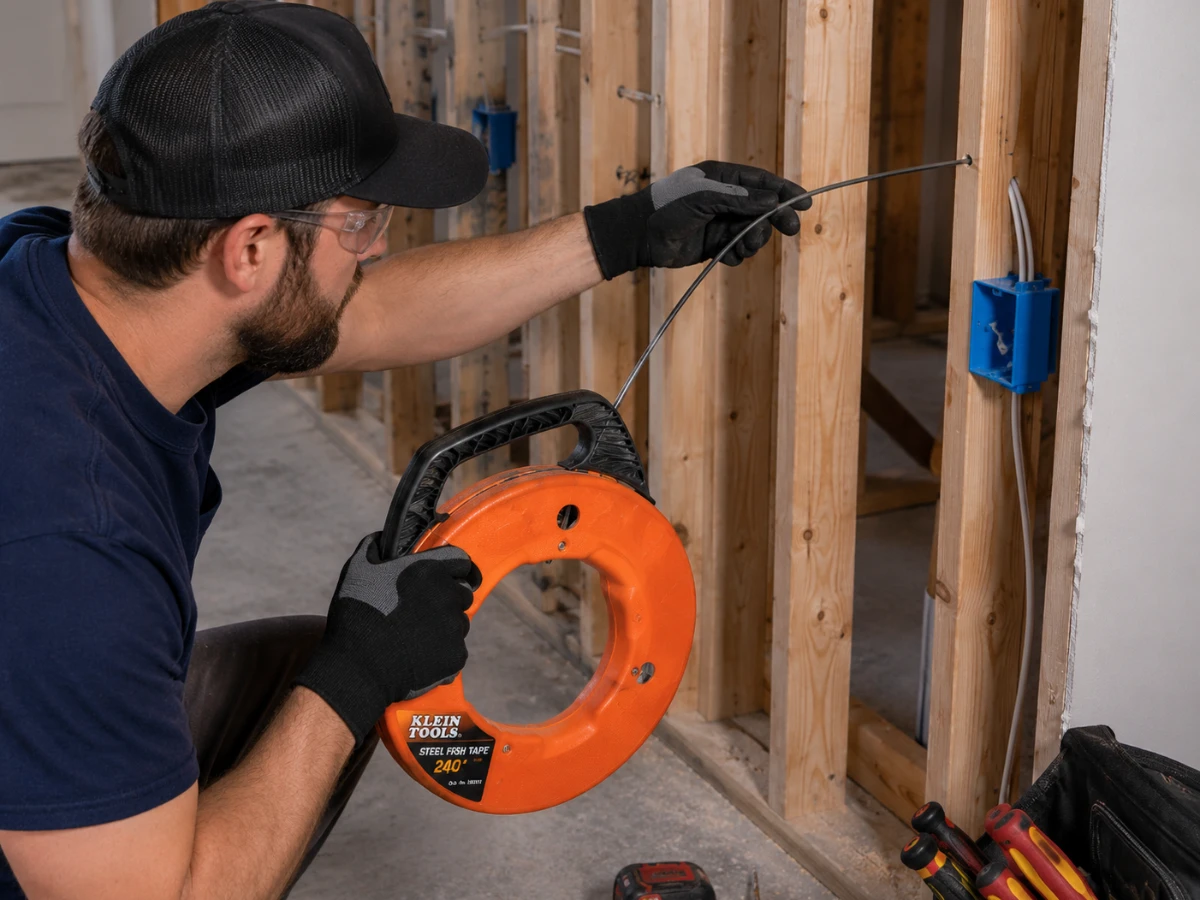
By installing a true neutral, you aren't restricted to no-neutral specialty hardware. You can pick almost any high-end smart dimmer on the market, ensuring consistent, flicker-free performance and support for any smart home tech you decide to add in the future.
To see how we can help you upgrade your entire home's electrical ecosystem, you can learn more about our smart home wiring services here.
Implementing Specialized Bypass Dimmers
If rewiring isn't feasible, we can install industrial-grade bypass dimmers. Unlike consumer-grade DIY kits, we calibrate these modules to account for the specific electrical load and impedance of your home's lighting circuit.
This ensures that installing the smart switch doesn't lead to voltage instability, flickering, or heat buildup issues, and meets the required safety standards for vintage home automation solutions.
Ready to Bring Your Historic Home into the Future?
You don’t have to be limited by 1940s technology to enjoy 21st-century comfort. Let’s get those smart lights working the way you want them to.
Loch Monster Electric would love to help you bridge the gap between historic charm and modern convenience. Give us a call on 763-292-1191 or fill our online contact form and we’ll get in touch with you.
Frequently Asked Questions
Not necessarily. It isn't a safety code violation for an existing home to lack a neutral wire in a switch box, provided the wiring is in good condition. It just limits your options for modern devices. However, if your wiring is crumbling or you notice burning smells, that is a different story that requires electrical repairs from a licensed professional.
Smart bulbs are a great alternative to smart switches. If you can’t swap the switch, you can simply put a smart bulb in your lamp or fixture. However, remember that the wall switch must always stay in the ON position for the bulb to be smart. If someone flips the switch off, the bulb goes offline.
It varies depending on how accessible the wiring is behind your walls. We always recommend a quick site visit to assess your specific home’s layout. It is often more affordable than people think, and it adds permanent value to your home by future-proofing your electrical infrastructure and removing limitations for future smart device compatibility.
This is the most common complaint with these devices. Because the switch is stealing power from the circuit to stay alive, some LED bulbs aren't compatible with that low-level trickle of electricity. A bypass capacitor usually fixes this. While many homeowners tackle this themselves, it involves working with live electrical components, and is always safer to have a professional handle it.